Share this Post
Holiday Hair Tutorial “Haute for the Holidays” Series
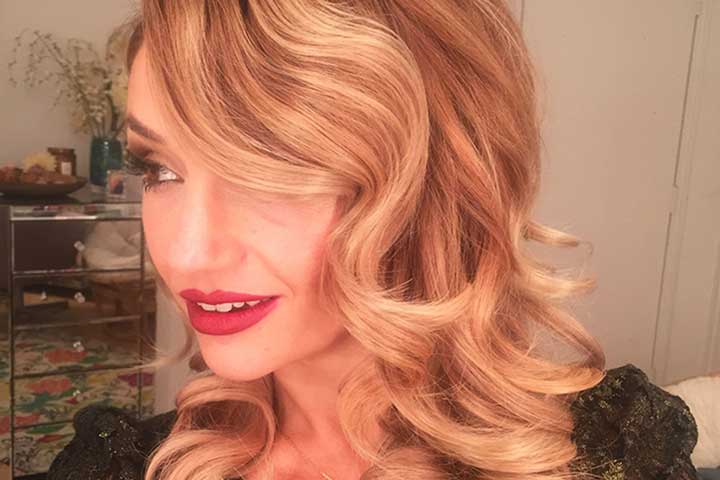
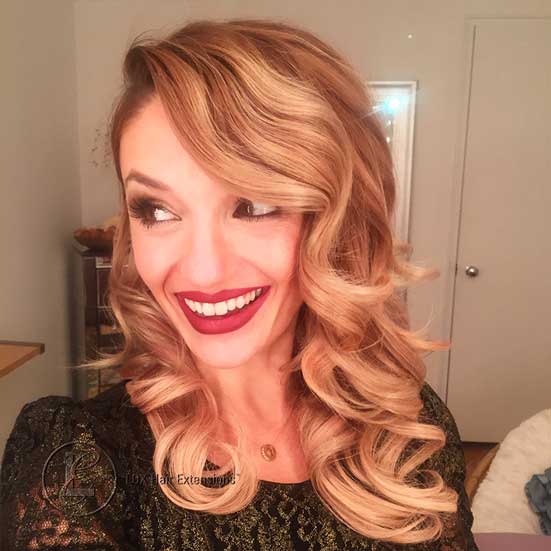
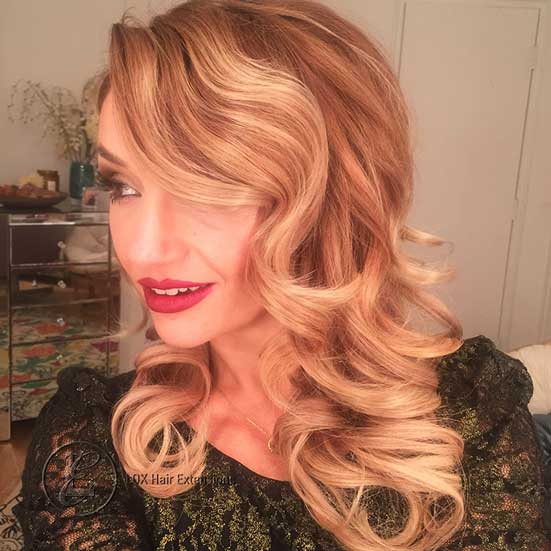
Look 2- Sideswept Siren
Welcome back to the second look in our series “Haute for the Holidays” by LOX Hair Extensions. The Sideswept Siren is one of my personal favorites, especially around the holidays. This tutorial will show you how to create a vintage wave that will make you feel sexy and glamorous!
Sideswept Siren
A sexy modern take on Old Hollywood Vintage Wave.
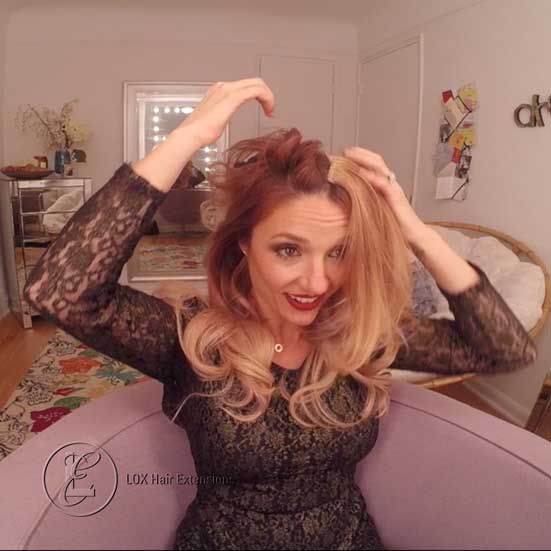
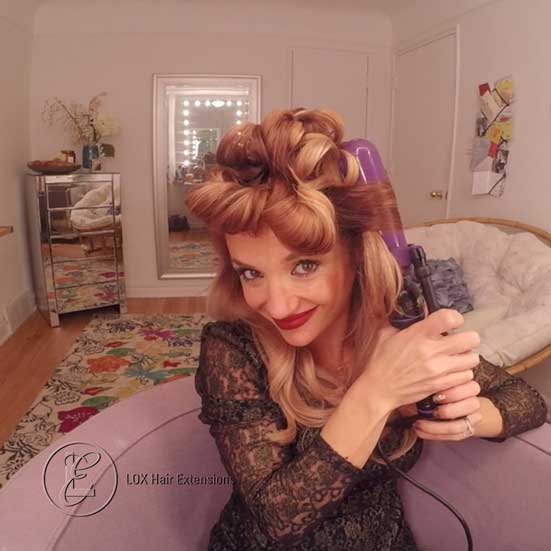
Vintage Wave Tutorial-Creating the curl
To get started you’ll need to gather a few tools: LOX 5 Piece Clip In Hair Extensions, a wide tooth comb, curling irons, 1 and 2 inches, a LOX Loop Brush, and your preferred styling products. At LOX, we love Kérastase professional products like Powder Buff dry shampoo, Laque Couture working spray, and dual acting heat protector and leave in conditioner Therapiste.
- Apply Therapiste to your natural and clip in hair. Then use your LOX Loop Brush to remove any tangles.
- Apply clip in hair extensions row 1-4. On the side that you part your hair to you will apply an extra side piece higher on the head than what we typically recommend. Spray your hair with Powder Buff when complete.
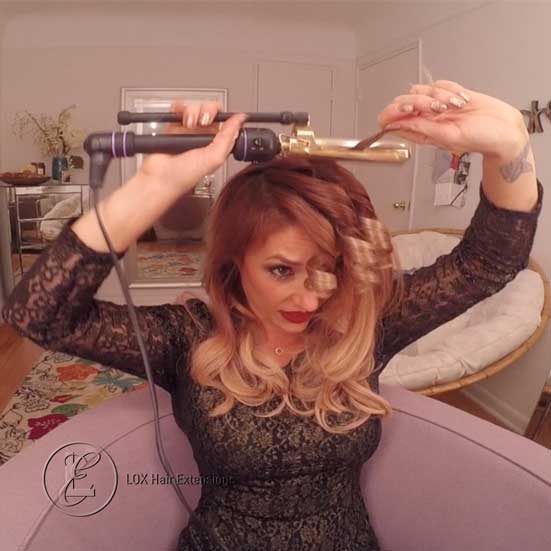
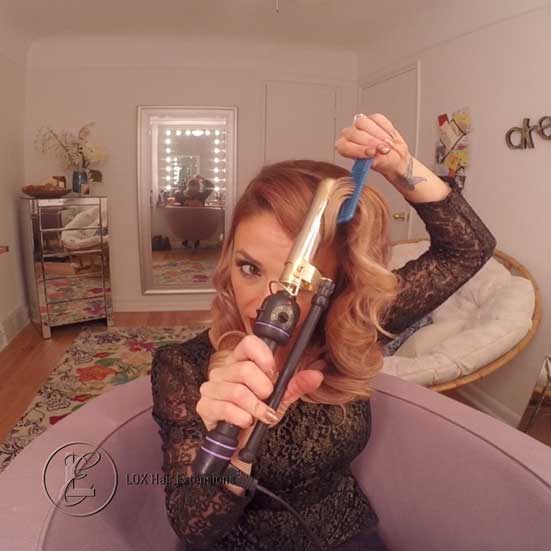
- Start in the front of your hair, take a section the width of the curling iron, and with a diagonal parting. Use your smaller curling iron on this section winding the hair back away from your face. Make sure to apply most of the heat at the base of your hair to maximize volume, this helps set the vintage wave. Continue this until you reach the back of your head.
- In the crown take horizontal sections, and over direct them up. Curl with your 1 inch iron. You may pin all of these curls to help set the texture into the hair using bobby pins or clips. Repeat the same pattern for one more horizontal section.
- Complete the bottom most section in the same direction using the bigger iron.
- Most of the hair should be curled at this point aside from the opposite side section. Split this section into three vertical partings. Start with the front section and direct it back by your ear, and use the smaller curling iron to wind the hair toward your face until you reach the ends. Repeat on the next section. The last parting should be curled in the opposite direction with the bigger iron. Use pins to hold in place and set the vintage wave.
Completing the Vintage Wave
- Remove all pins and lightly brush with the LOX Loop Brush. Lightly back comb all of your natural hair above the clip ins. Shape the overall look using a wide tooth comb and Laque Couture hairspray. Tuck the hair behind your ear on the smaller side, and bobby pins to secure.
- In the front section, use your comb to find the “S” shape in the wave that creates the vintage feel. Use your small curling iron to indent the vintage wave, and the teeth of your comb to press the hair against the iron and emphasize the look.
Thank you so much for joining us, I know you will love this look as much as I do. Please subscribe to our YouTube Channel and connect with us on social media for more hair tutorials. Stay tuned for more videos in this series!
You inspire us, please be sure to #loxextensions and share your amazing transformations. For inspiration, visit LOX hair extensions before and after gallery on our Facebook Page! We welcome you to be part of the LOX Extensions family, join us!
Share this Post